How to set up Ledger Nano S hardware wallet
Important note
To use the Ledger Nano S Ledger Nano device, first turn it on and create a PIN code. Then, the device will generate 24 keywords. If you receive a device with a pre-written recovery phrase or PIN, please do not use that device. Ledger never sends the PIN code or recovery phrase with the product and will never ask you for the 24 words or PIN code. In such a situation, you should contact Ledger support.
The Ledger Nano hardware wallet will allow you to manage and control your cryptocurrencies through the Ledger Live app. When you set up your Ledger Nano device, it creates a set of private keys for you, which you can use to manage a set of your encrypted assets in the Ledger Live app. The job of wallets is to protect private keys from any theft. To be clear, if you do not have control of your private keys, you are not actually the owner of your crypto. Ledger Nano allows you to manage and protect your private keys at any time. The most important part of your Ledger wallet is your recovery sheets. You should write down the 24-word recovery phrase on the white sheets of the device when installing Ledger.
important points :
-
Never enter these words on any device.
-
Never send them to anyone.
-
Anyone who has your recovery phrase will own your crypto assets.
-
Be careful when writing down the 24-word phrase to make sure all 24 words are correct.
-
Ledger makes it easy to manage and protect your cryptocurrency assets.
How to set up Ledger Nano S step by step
- First, connect the Ledger Nano S wallet to a mobile phone or computer.
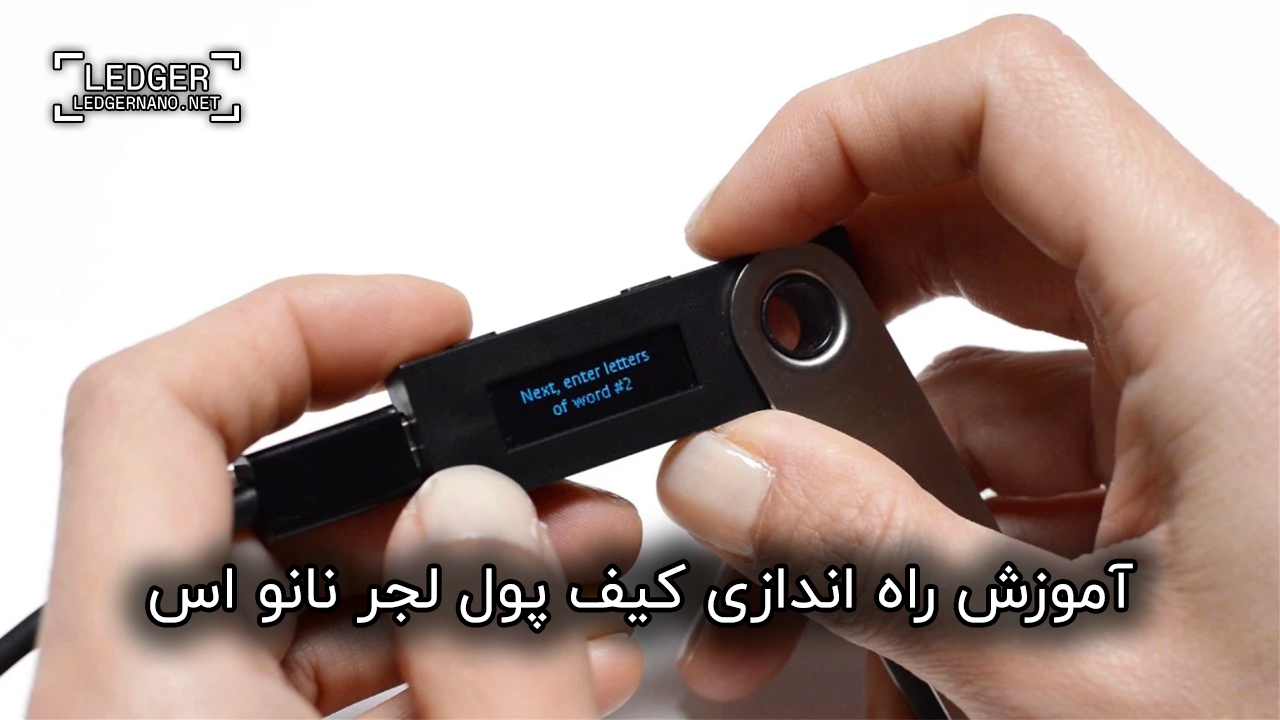
- You can navigate through the menu using the two buttons built into the Ledger Nano S, and each time you press both buttons, the desired operation will be confirmed.
- After turning on the device and seeing the welcome message, scroll by pressing the right button until you reach the phrase set up as new device.
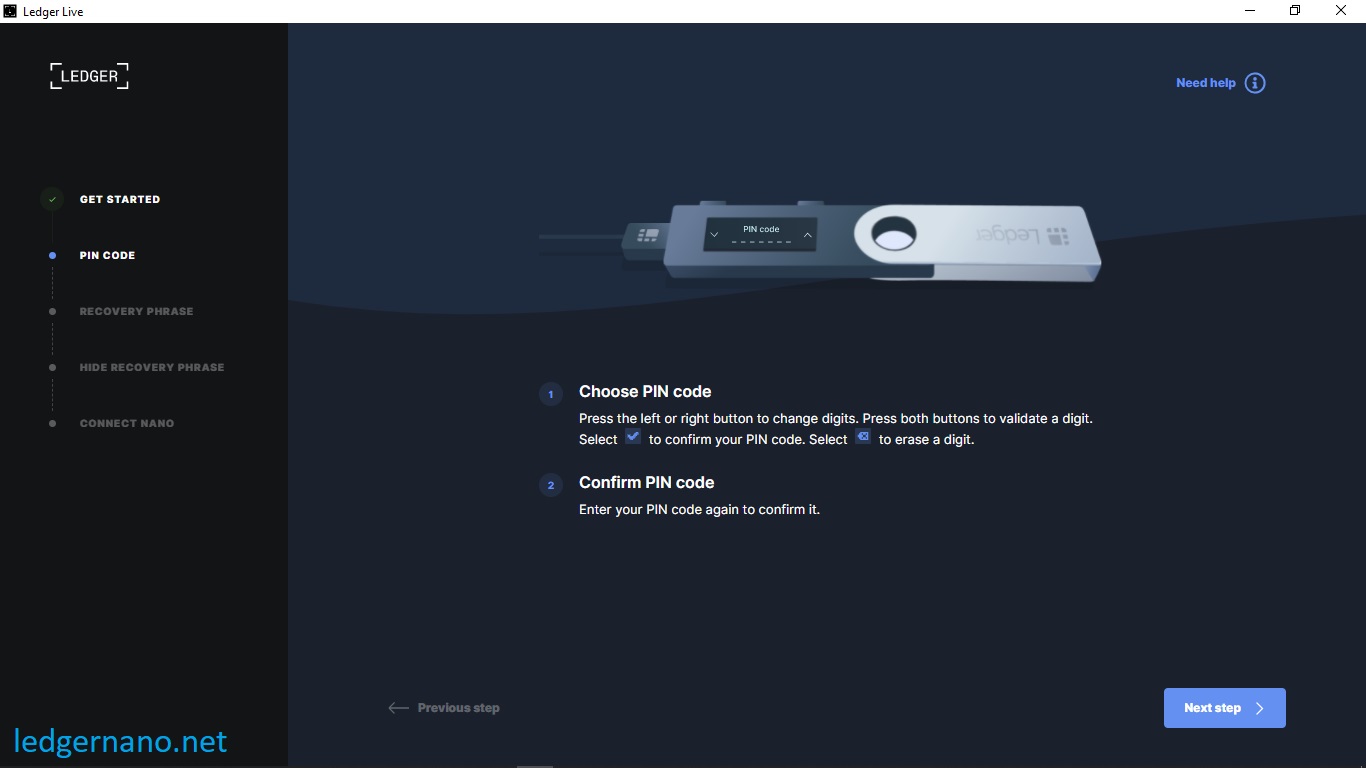
- Then you need to choose a PIN code for your device.
- By pressing the left and right buttons, the numbers increase and decrease and you can choose the pin code you want. (Any number you want, confirm it by pressing two buttons at the same time).
- It is necessary to remember this pin code.
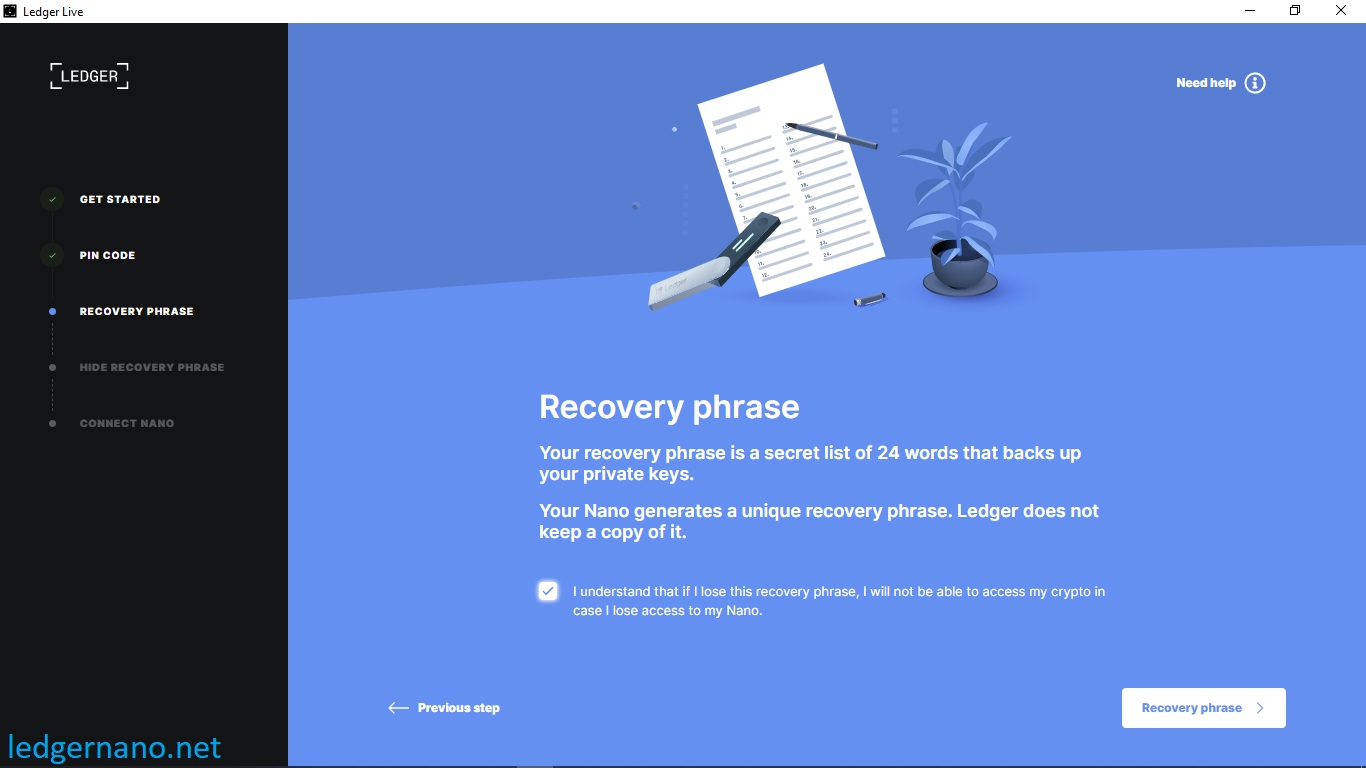
- After selecting the pin code, the device will give you 24 recovery words. Word order is important.
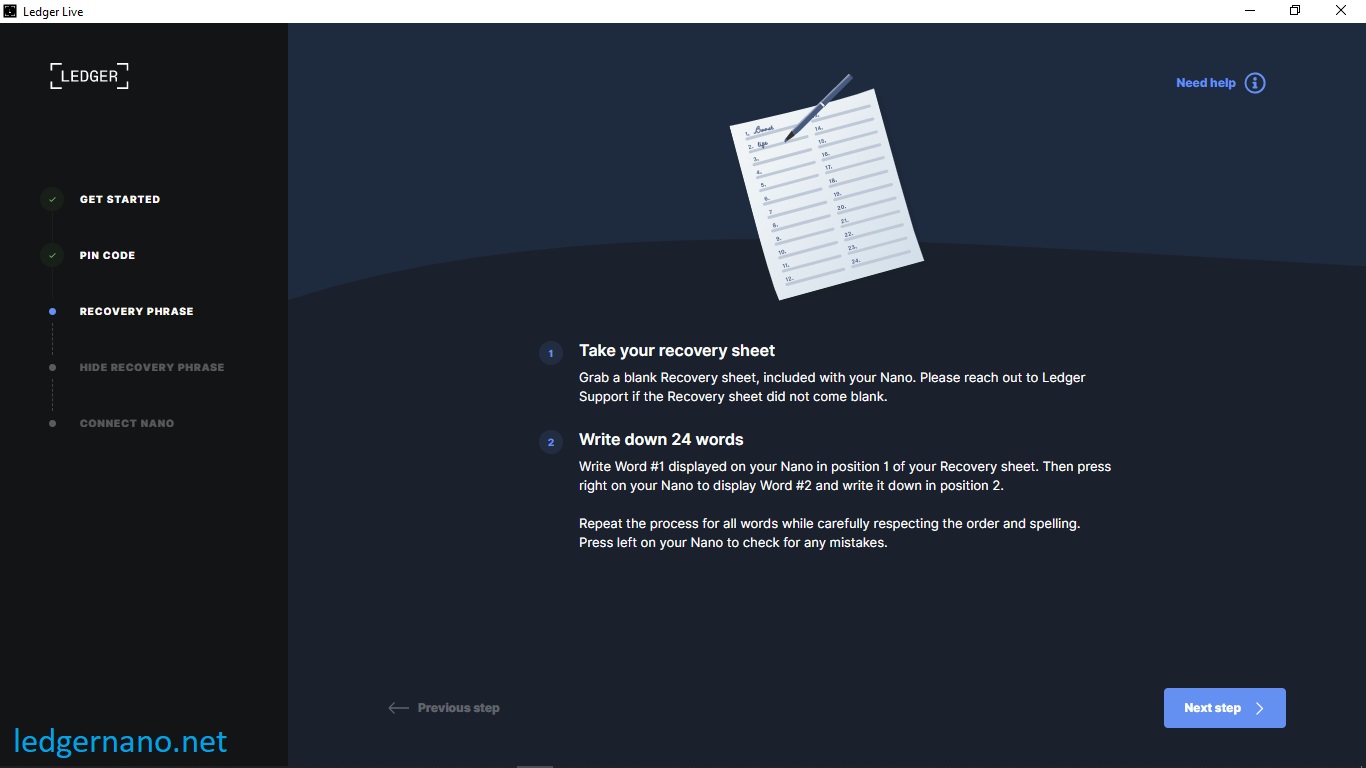
- Write down each word in order and keep it in a safe place.
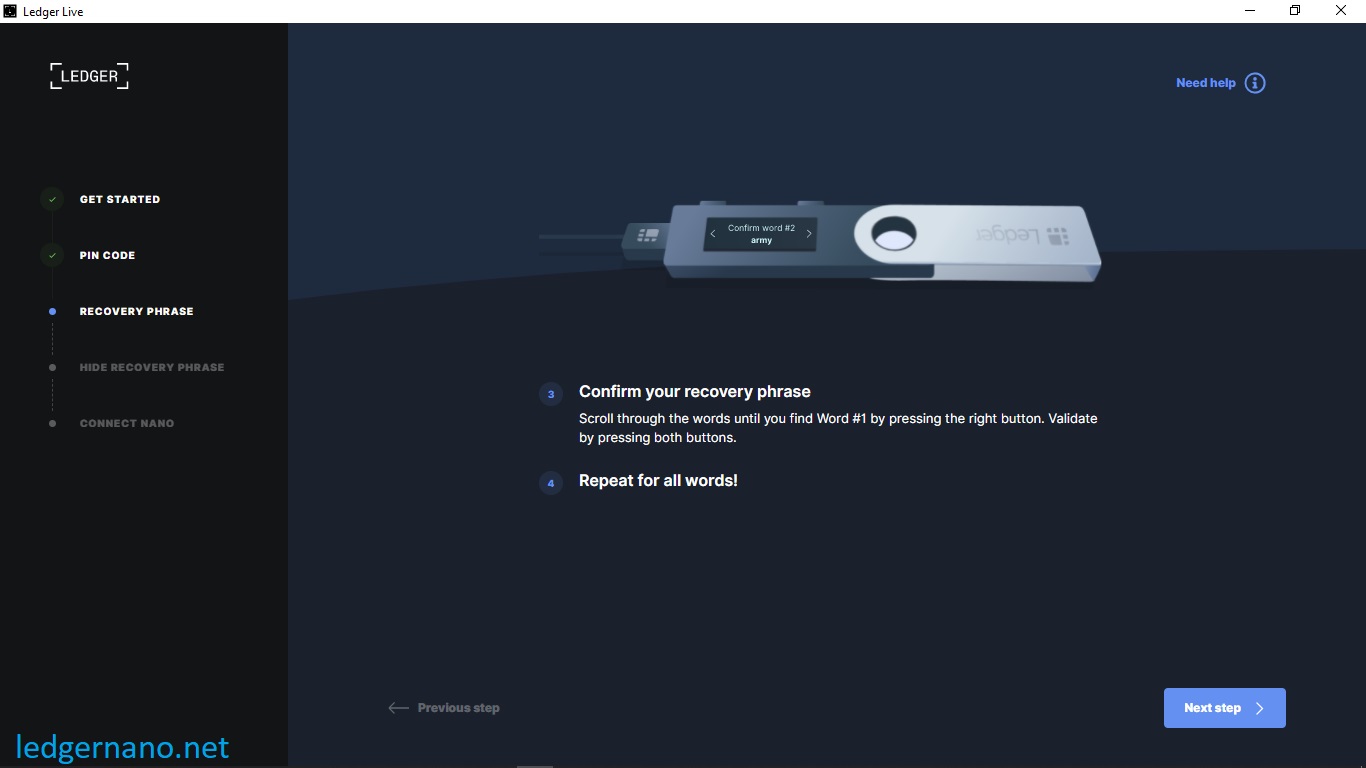
- In the next step, Ledger Nano S will show you the words randomly. By moving between the words (with the left and right buttons), a correct word is found,and then confirm it by pressing two buttons at the same time.
- After confirming 24 words by pressing two buttons at the same time, the setup of Ledger wallet is completed and your device is ready to work.
Ledger Nano S launch video
You can also see the setup steps in the video below.
How to set up Ledger Live for Ledger Nano S in Windows operating system
To start Ledger Nano S, you must first install the Ledger Live software on the system you want and then open the software.
In the next step, you have to accept the rules and regulations.
In the next step, you need to select your desired device, which you need to select Nano S.
In the next step, if it is the first time you want to launch, select the First time using your Nano S option.
In the next step, you will be shown some tutorial messages.
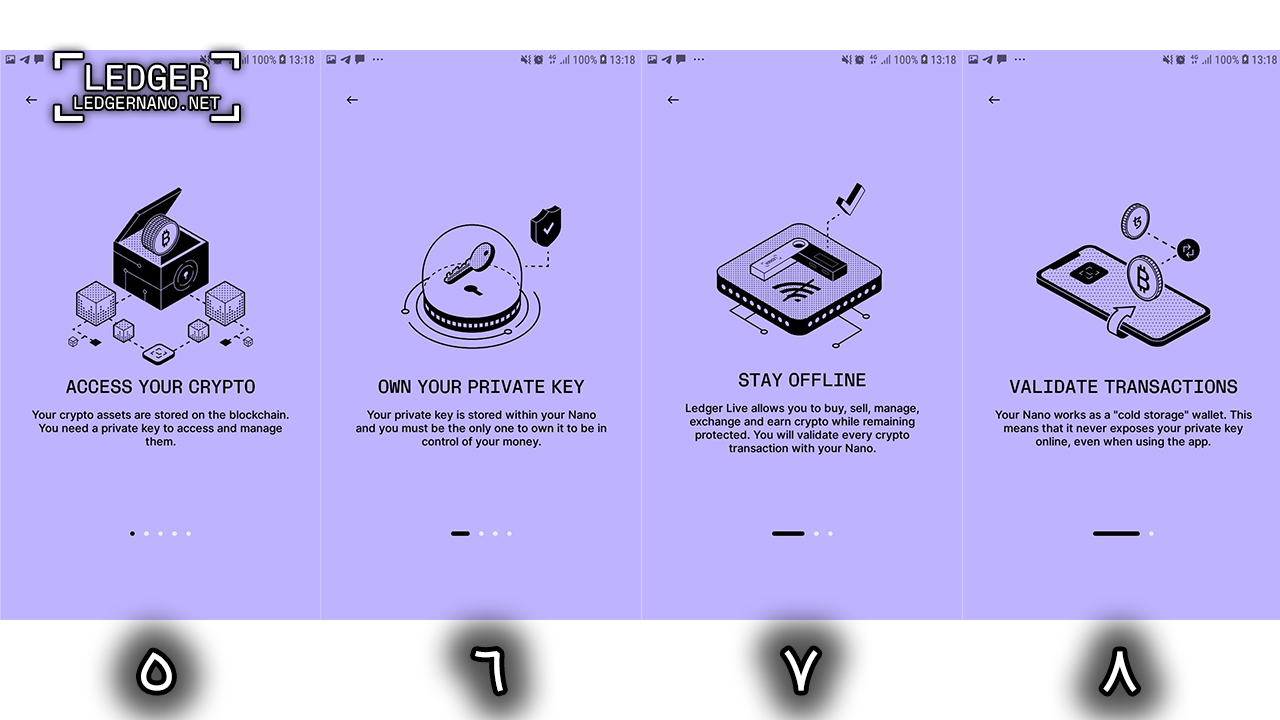
The image below says that your assets are stored on the blockchain and you need a private key to access these assets.
In the next step, the message says that your private words are stored in the ledger and we need you to be the only one who knows these private words.
Next, it tells you that private words are always private and are never shared on the Internet.
In the next step, it tells you that you have to physically press the buttons to confirm the transactions, and it also says that you can buy and sell as well as exchange currency using Ledger Live software.
And finally you are ready to launch.
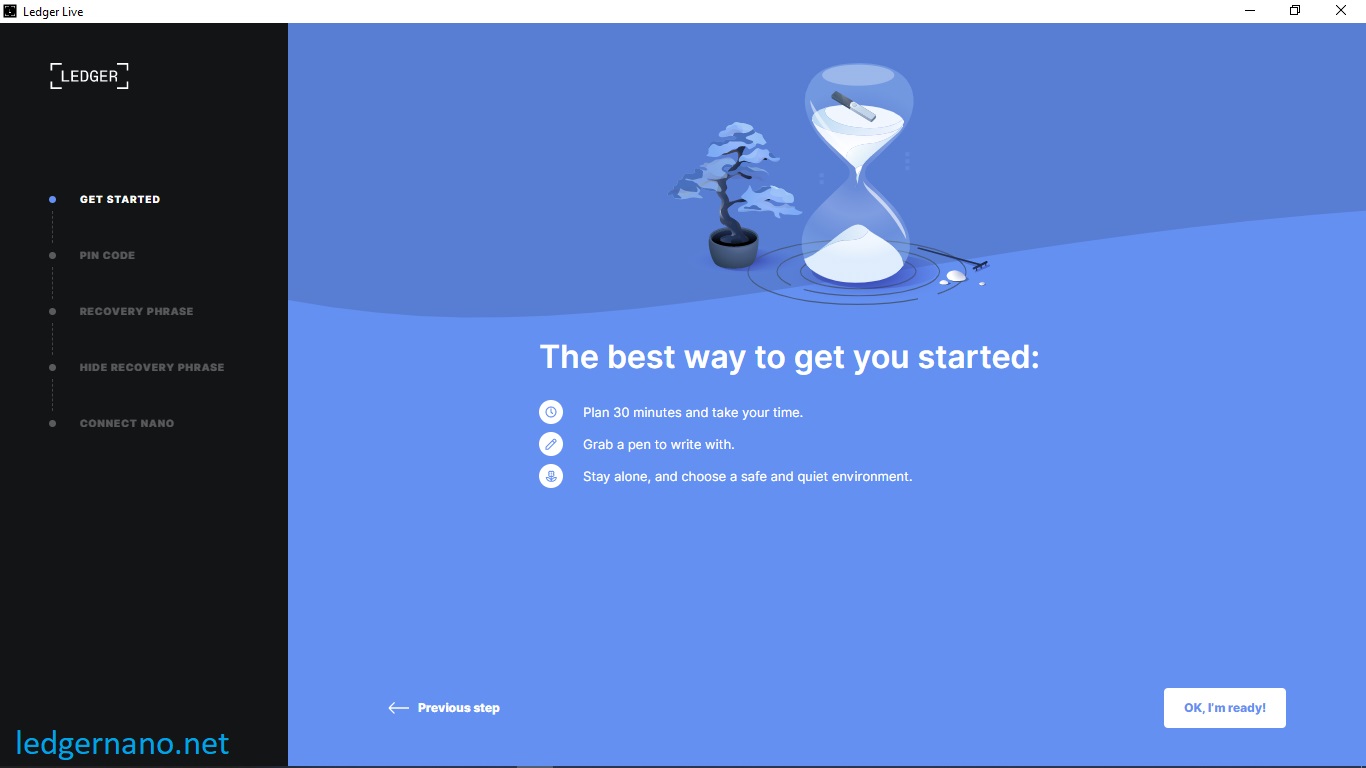
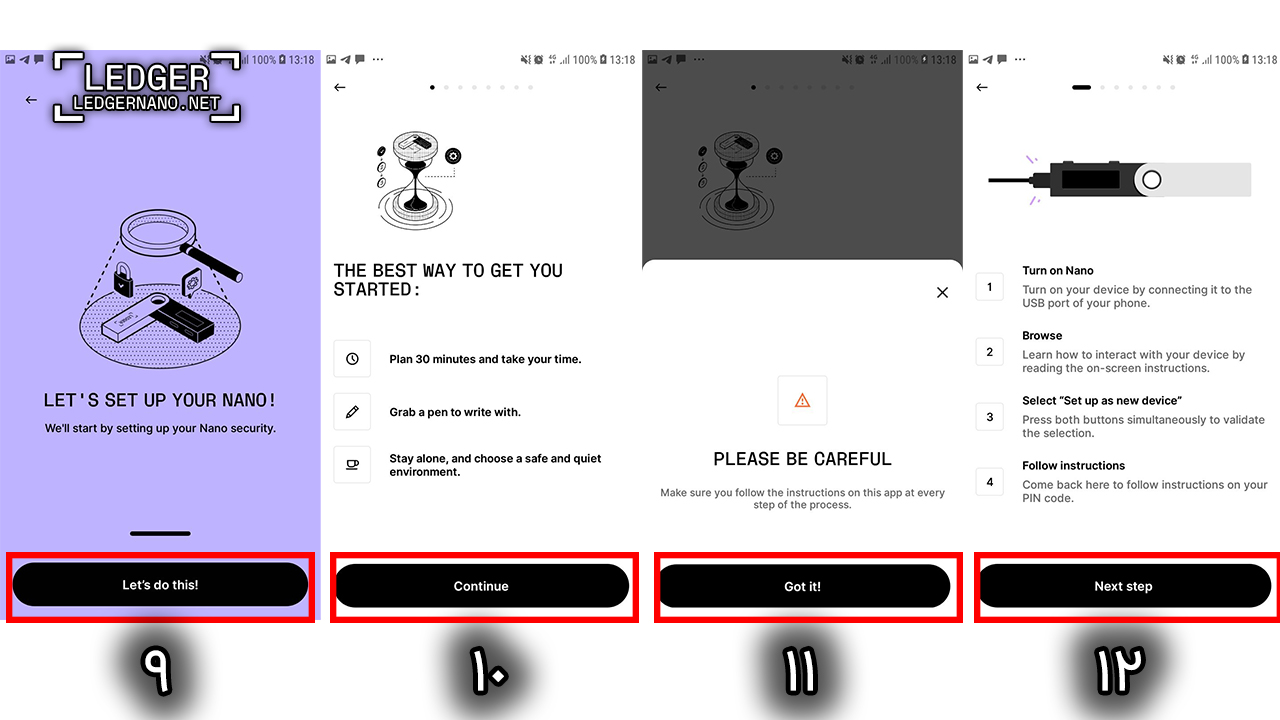
In this step, the setup steps and how to setup will be explained to you
- Setup will take you 30 minutes.
- Have a pen with you to write down keywords.
- Choose a safe and quiet place for yourself.
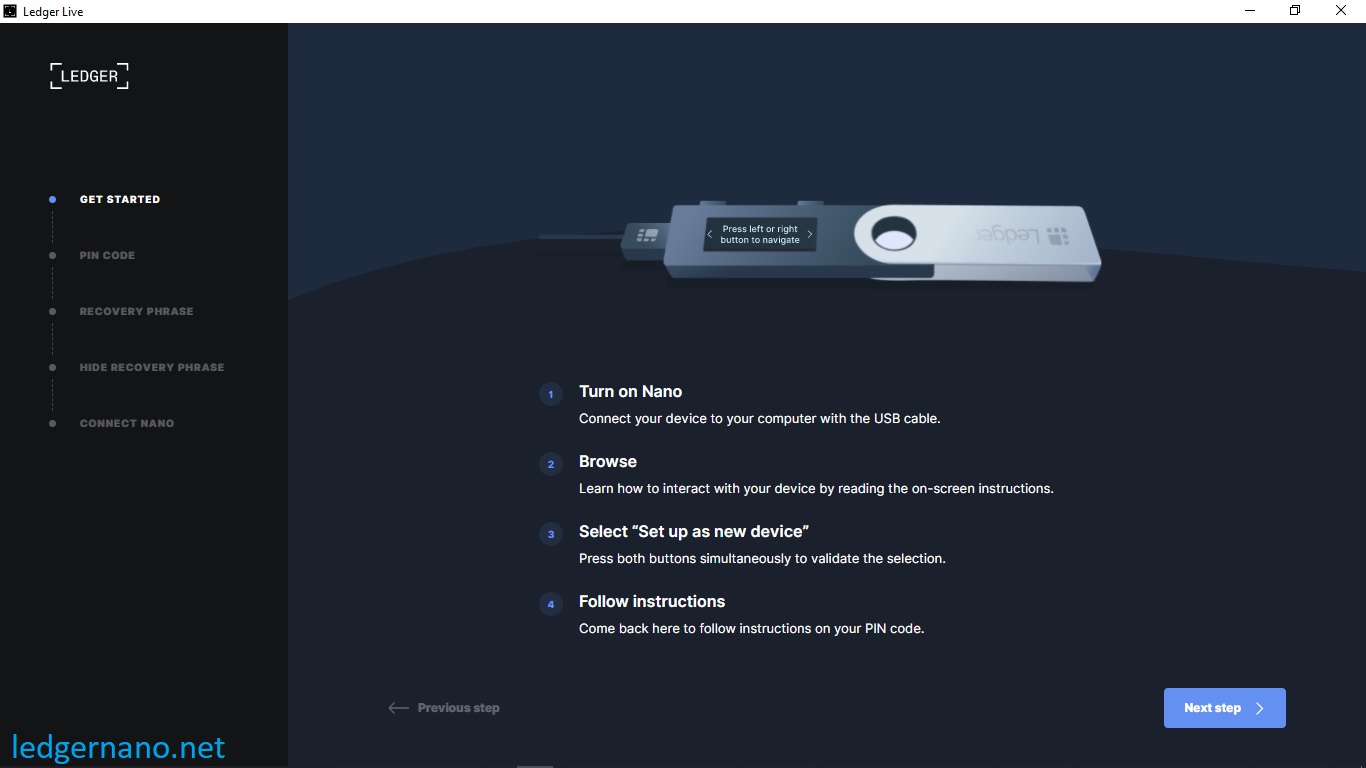
In the next step, you are asked for the following steps:
- Turn on the ledger
- Navigate through the displayed menu using the buttons
- Select the option set up as a new device.
- And follow the instructions.
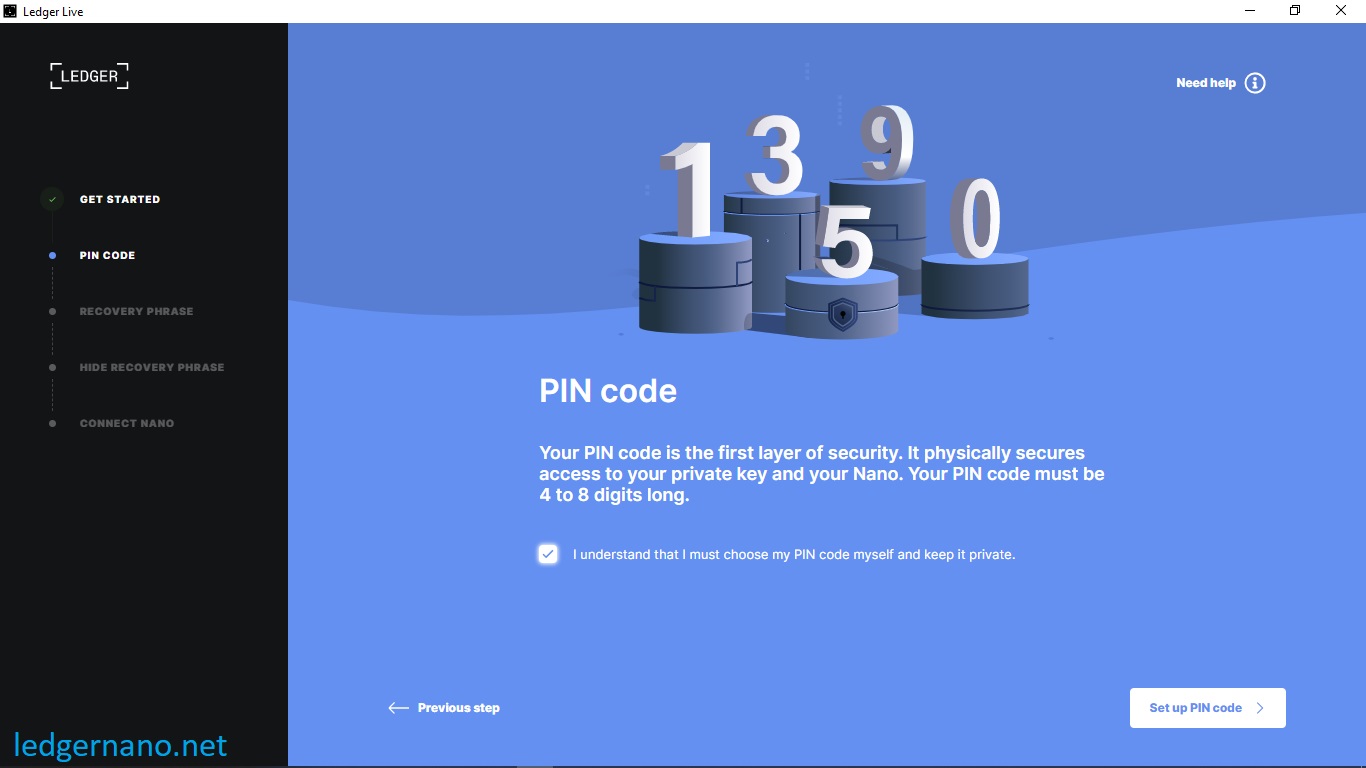
In the next step, you will be asked to choose a 4 to 8-digit PIN code for your device.
Security tips for choosing a safe pin code
- Choose a pin code of your choice. The importance of this code is very high. This code unlocks your device.
- An 8-digit PIN code provides an optimal level of security.
- Never use a device that comes with a PIN code and/or recovery phrase.
- Do not choose a simple pin code like 1234
In the next step, you must repeat and confirm your chosen PIN code.
In the next step, it tells you that you will be given 24 private words that are unique to you and these are unique keys that you must keep.
In the next step, you will be asked to take the recovery sheets and write your 24 words on it.
In the next step you will be asked to confirm your 24 words.
In the next step, you will be told not to take any pictures of your words or publish them anywhere.
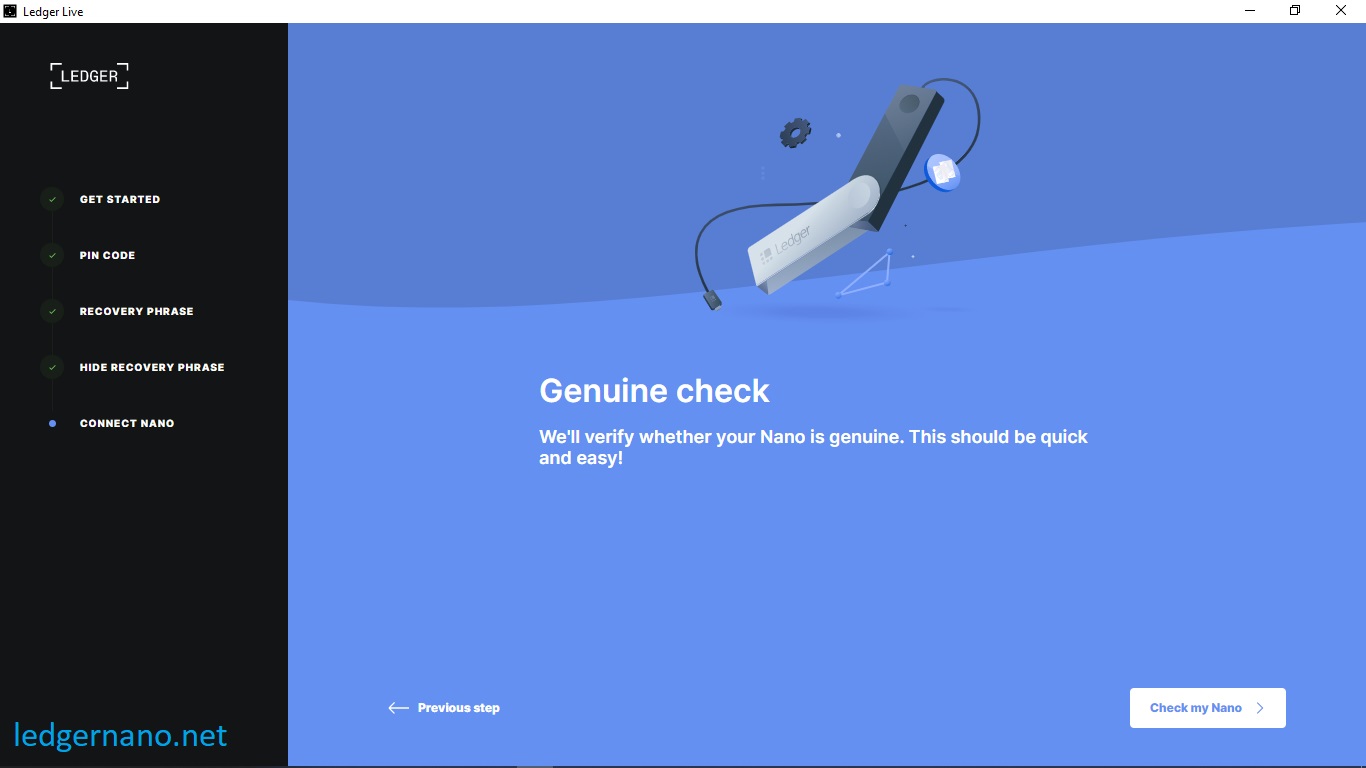
Next, after answering three questions, you will enter the Nano S authenticity check stage. Your Nano S should be in the dashboard section at this point. After clicking on “Check my Nano,” a message will appear on your Ledger asking you to allow Ledger Live to check your Nano S.
After your permission, by pressing both keys on the ledger, your ledger will be checked and a message like the one below should be displayed.
How to set up Ledger Live for Ledger Nano S on Android operating system
You can see the steps for setting up the Ledger Nano S in the images below.
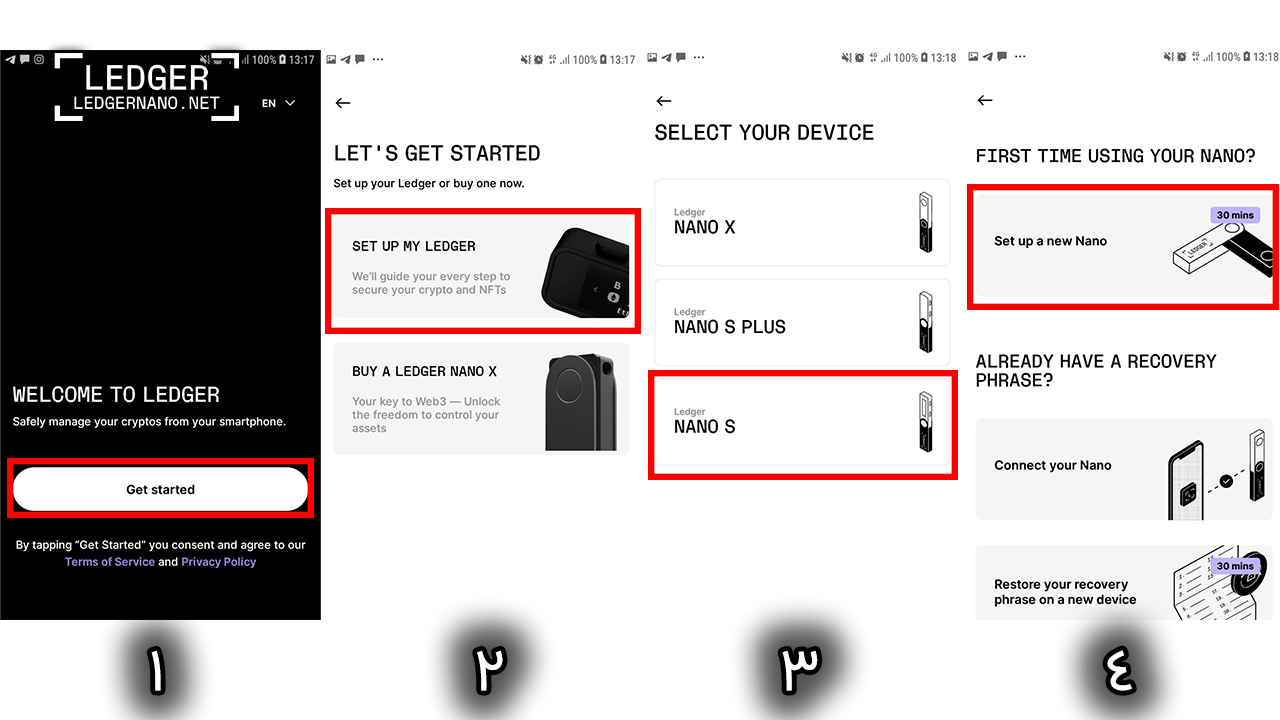
First, click the “Get Started” button, then select “Set up my Ledger.” In the third step, you need to select the Ledger Nano S from the available wallets. In the fourth step, select “Set up a new Nano.”
In steps 5 to 9, Ledger will teach you about blockchain and wallets.
Steps 10 to 12 describe the steps you need to take to set up your device. As you can see in the image below, in step 12, you need to follow the four steps explained. Turn on the device by connecting it to your mobile phone. In the menu, press the right button to scroll to “Set up as new device.”
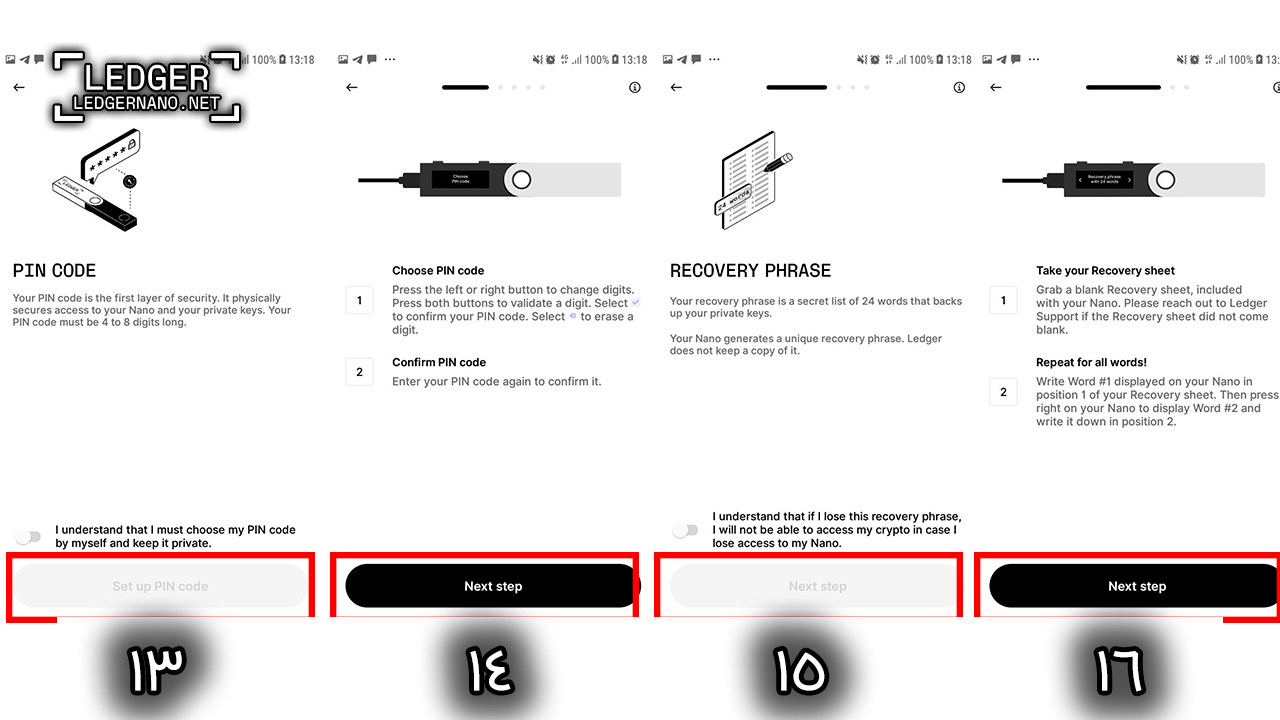
As you can see in steps 13 and 14, you need to choose a PIN code and repeat it. In steps 15 and 16, you are instructed to write down the recovery words carefully and in a safe place.
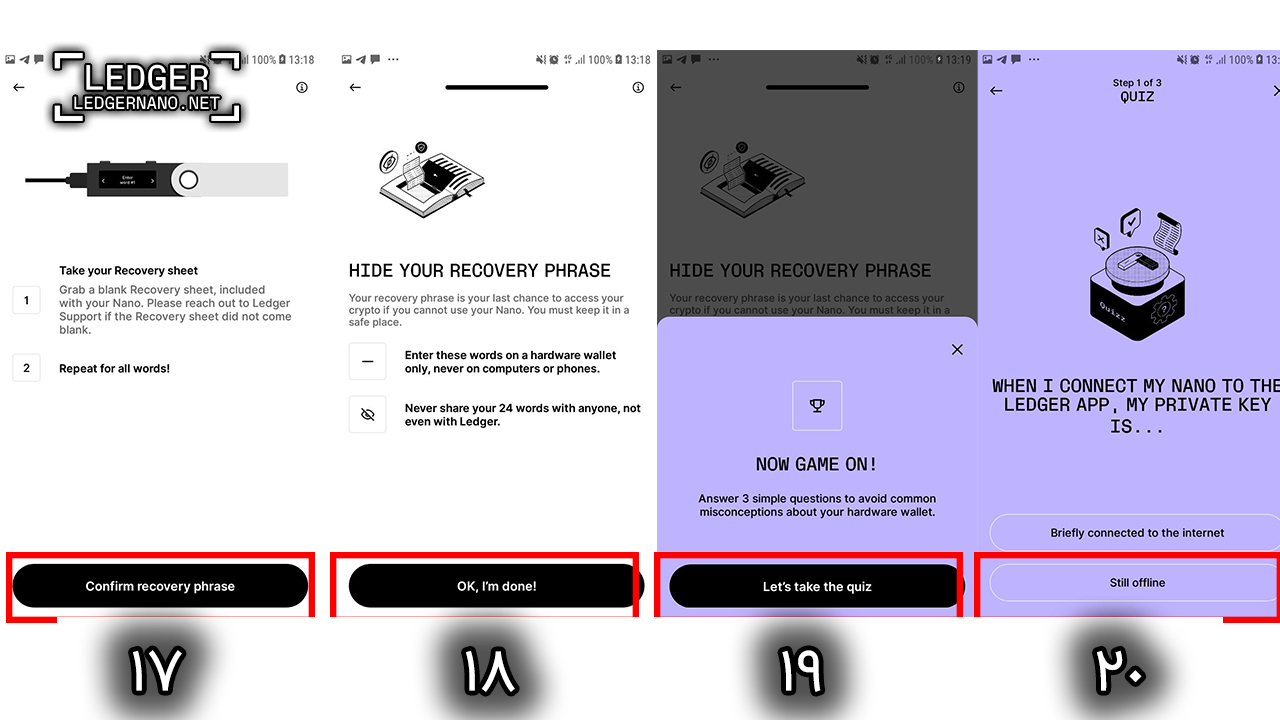
In step 17, you are told to re-enter your recovery words and validate them. In step 18, you are instructed to keep your recovery words in a safe place.
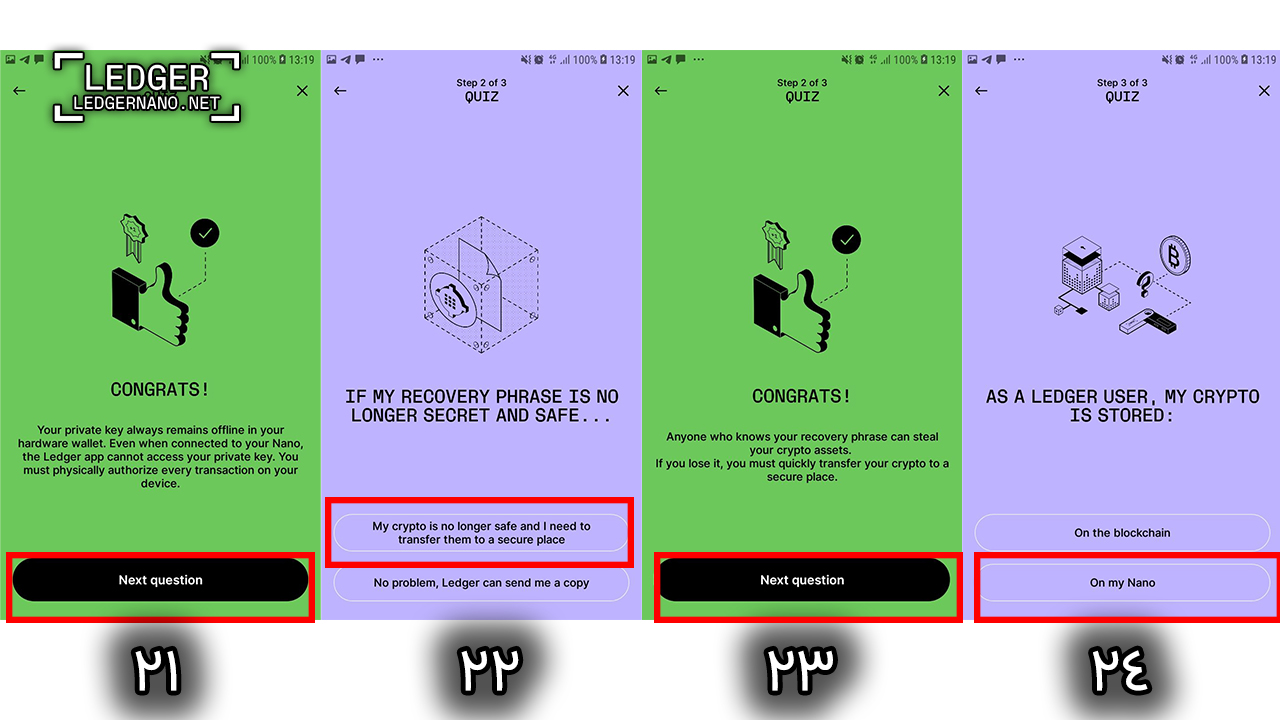
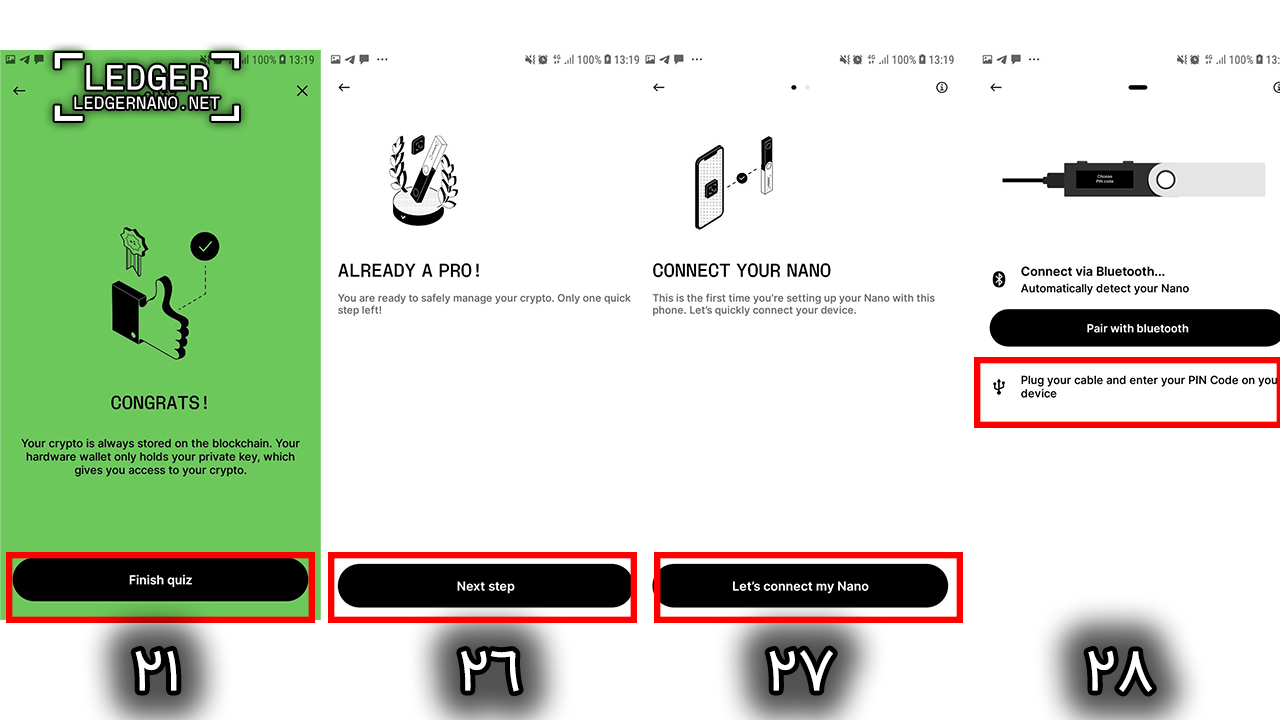
In the 19th to 21st steps, you will be tested on your initial knowledge to ensure that you are ready to work with the wallet.
And at the end, you will be asked to choose the type of connection that should be connected to Ledger Nano S only with USB.
If a user receives a device with a pre-written recovery phrase or PIN code, they should not use the device. This is because it means that the device may have been previously used by someone else. Ledger will never include a PIN code or recovery phrase with the product, and will never ask the user for one. In such cases, the user should contact Ledger support.
The Ledger Nano S comes with a micro USB cable. It is recommended to use a device that has iOS 13 for Apple devices or Android 8.1 for Android devices. For computer users, the following operating systems are supported: Windows 10 or 11, macOS Big Sur, macOS Monterey, macOS Ventura, and Ubuntu LTS 20.04 or 22.04.
